Wednesday, November 30, 2011

Using Up Halloween Treats 3: Camamilk Cookies!

You know what's a good sensation? Having warm, sticky, gooey liquid exploding into your mouth...


DSC02477

Yep, biting into a caramilk! In case you don't have it wherever you are, it's a chocolate candy bar that are divided into small squares...and each square is filled with a gooey caramel!

The best part of it is you get chocolate and caramel side by side so you get chocolate and caramel and not have the flavours muddled up together. So I wanted to keep them more separate in my dessert. Also, since I already made a pie and I made a cake I thought it was the most logical place to go.

DSC02484
Cookies!

Now I'll confess, I was trying to make thin cookies but that didn't turn out. The good thing is...these are actually fantastic! The cookie was really light, airy, almost cake like and the chocolate and caramel made it special and it was just the perfect balance because you have the immense sugar rush from the candy but the cookie dough is more mild and subdue.

Caramilk Cookies
Serves: 14 cookies (they're rather large though)

Ingredients:
DSC02479
Caramilk: 10 small bars (so 20 squares)
Flour: 300g (2 1/5 cups)
Butter: 200g (almost 2 sticks, go wild!)
White Sugar: 50g (1/4 cup)
Brown Sugar: 50g (just for the sake of simplicity it'll be 1/4 cup, it's close enough, accurately it's supposed to be 11/50 of a cup)
Egg: 1 large
Milk: 60g
Salt: 1 pinch
Baking soda: 1 1/2 teaspoons

Instructions:
1. Break off the caramilk pieces into the neat squares and put in the freezer. I froze them so it'll be easier to mix them later.
2. Preheat oven to 375.
3. Sift flour, baking soda, and salt.
4. Cream the butter and sugar with the paddle attachment until well incorporated.
5. Add the egg and milk until it's all mixed well.
6. Turn down the speed to it's lowest and add the flour mixture, when it's all in, turn up the speed to high.
DSC02480
End result.
7. Now add the frozen caramilk squares to the batter and mix with a spatula.
DSC02483
8. I used a soup spoon that they use for eating pho =P. Then I scooped it till bout that high, don't pack it in too much, just cusp it to make a shape like that. Each one was about 50g...almost 2 ounces!
9. Slide it down on the parchment paper (it'll be like ice cream scoop shape)
10. Put in oven at middle rack and take it out when the sides are bit brown, give it a light poke, insides should feel soft...like a moist sponge.

And then you patiently wait for it to cool down fi--

DSC02485

I expect no one to follow that last rule. Although I did last like...five minutes =O. But cookies are like best when they're fresh and the chocolate is all hot and velvety...mmmmmmmm...


Ahem...I mean, enjoy the cookies =)! Approved by my picky father.

Sunday, November 27, 2011

Turkey Day 2011! Forth (and Final)

Part One: Appetizers
Part Two: Mains and Sides

Pumpking Pie

Yes folks! What you've all been waiting for! A good ole' slice of pumpkin pie. Well the picture could be better but this was when I just started using the camera.

So...

Image Source,Photobucket Uploader Firefox Extension
(I'm trying to distract you with sexy James Mcavoy)

Pumpkin Pie
Servings: 1 pie

Ingredients:
Pie dough: 225g (recipe found here)
Pumkin: 1/2 a small sized baking pumpkin (200g)
Evaporated milk: 100ml
Cloves: 1 1/2 teaspoon
Allspice: 1 teaspoon
Cinnamon: 1 teaspoon
Nutmeg: 1 teaspoon
Egg: 1 large
Brown sugar: 100g (or to taste)
Vegetable oil

Instructions:
1. Preheat oven to 350. Cut and gut one half of the pumpkin.
2. Rub some oil on it, put the pumpkin on a pan and into the oven, middle rack.
3. In the meantime, shape the pie dough in the pan and blind bake (which means bake the pie crust first), seen here
4. When the pumpkin is soft, take it out and turn down the oven to 275
5. Scoop out all the pumpkin flesh, add the spices, milk and sugar and blend in a food processor (or mash it with a fork)
6. Add the egg.
7. Add the pumpkin mixture into the pie crust, bake it in a shallow water bath. Bake until the mixture is set, like custard.
8. Let it cool before even attempting to cut it.

So there you have it! My whole thanksgiving meal. It was a bit tiring but something quite rewarding making a meal and sharing it with your closest friends. And by sharing I mean showing off. Also you can make a long ass blog post about it. Priorities...

But all in all it was a fun night and when you get to eat your delicious food and hang out with friends...you forget about the meltdown you had 24 hours prior.

Can't wait till Christmas!

Turkey Day 2011! Third Phase

For part one which have the appetizers.

Main Course

Right, there's no turkey on turkey day, oh noes! The truth is I am not that big of a fan of turkey and it's just so damn temperamental so I'm going to be Chinese and cook pork! I used pork shoulder because it has more fat and therefore is juicy longer than a regular tenderloin.

For sides I made mushroom casserole, potato rosti, and pan fried vegetables.

Garlic Pork Loin:
Servings: 5

Pork shoulder: 1 (like around 1kg?)
Garlic: 1 1/2 heads
Salt and pepper: to taste
Butter: 1/2 stick

Instructions:
1. Preheat oven to 300
2. Peel the garlic cloves, boil hot water, add the garlic in until soft but still somewhat firm.
3. Trim the outer fat layer and connective tissue on the pork loin.
4. Poke holes around the loin with a knife and stuff the garlic clove in it.
5. Rub the loin with some oil and season with salt and pepper.
6. Put the loin in oven, until it is 145 degrees in the middle (light pinkness), Fahrenheit of course
7. Let butter soften at room temperature, rub it all over the loin.
8. Turn the oven to broil until the outside is brow, flip and repeat.
9. Let it rest for five minutes before slicing.

Mushroom Casserole

Mushroom Casserole

Ingredients:
Portabello mushrooms: 5 big ones
Cremini mushrooms: 2 small packs
Shallots: 5
Cream: 150ml
Wine: 150ml
Mozzarella: 200g
Butter
Flour: 1 tablespoon

Instructions:
1. Slice the portabello and cremini mushrooms.
2. Melt some butter in a pan at medium heat, add the mushrooms and some salt.
3. When the mushrooms are cooked, add the flour and put on low heat, stir for a minute.
4. Add the white wine, turn the heat to medium again.
5. When the wine has thicken, add the cream and stir until the cream thicken as well.
6. Put the mushrooms onto a loaf pan, top it off with sliced mozzarella.
7. Turn the oven to broil and put the pan under until the cheese is melted and browned.

Potato Rosti
Serving: 2 rostis

Potato Rosti
My favourite way to eat potatoes. You get the big potato flavour and texture because it's thick and it's really just potatoes nothing else so the flavour's like unadulterated but also the nice caramelization from frying it on a pan. At the same time because you shredded it first, it feels a lot fluffier than just simply roasting potatoes!

Ingredients
Russet potatoes - 5
Salt and pepper - to taste
Butter

Instructions
1. Heat salted water in medium heat.
2. Wash the potatoes, scrub with a sponge until clean. Put potatoes in pot.
3. When the potatoes are half cooked (fork should be going in with a little resistance), drain and cool.
4. Leave the potatoes in the fridge overnight.
5. The next day, using a grater, shred the potatoes, don't rub it back and forth the grater though, you have to push it down and then take the potato back to the top and push it down, like just in one way don't go up and down.
7. Heat up just enough butter to cover a non-stick pan at low heat, you need bout an 8 inch pan. Add half the potatoes, salt and pepper.
9. Cover with the lid, when the bottom is nicely browned, put a plate on top, flip it around so it's on the plate with the browned part on top and slide it back on the pan.
10. Cover and wait till the bottom is golden brown.
11. Repeat with the second one.

Note: Russets are best because they are the most starchy out of the common varieties so they are less held together and more fluffy, you want a soft texture with a rosti so you go with this kind of potato. As opposed to like the red potato which will be more firm.

Pan Fried Vegetables
Servings: 8

Sauteed Vegetables

Ingredients:
White asparagus - 1 bunch
Radish - 1 small bag (20 radishes about)
Carrots - 3
White wine
Butter
Salt and pepper

Instructions:
1. Boil salted water.
2. Cut carrots into matchsticks, radishes in half, and trim off the ends of the asparagus on a diagonal bias.
3. Blanch the vegetables first until a fork can go through them but they can't be mushy. (one minute for radishes, 30 minutes for asparagus, and 2 minutes for carrots about)
4. Melt butter on a large pan at medium high heat. Add the vegetables, stir quickly, adding some pepper and white wine to taste.

So that's the mains and sides. Pork > turkey definitely. Still very juicy and have a strong kick with garlic. Also the vegetable sides are delicious and very hearty to complete with the feel of a comforting but interesting meal.

Turkey Day 2011! First and Second Phase

joyciel's thanksgiving dinner

Well, being Canadian, this was actually in October but I was lazy and forgot to post my photos till it was...November lol. So let's just pretend it's because I like celebrate with our neighbours down south (America: Canada's pants).

So like last year, I designed the menu and did most of the cooking.

First Course
Potato and Leek Soup

Second Course
Stuffed Campari Tomatoes
Smoked Salmon Rolls

Third Course
Roasted Garlic Pork
Mixed Mushroom Casserole
Potato Rosti
Pan Fried Vegetables

Forth Course
Pumpkin Pie

Yea, I had ambitions! The key is to plan ahead as much as possible, and I did most of the prep the day before.

Anywho...on to the food!

First Course

Potato and Leek Soup
Servings: 8 - 10 people (I had a party of five but they like seconds lol)

Leek and Potato Soup

Ingredients:
Russet potatoes: 5, peeled and diced
Leeks: Three big nice ones
Chicken stock: 2L
Ginger: 1 sizeable chunk (bout 100g)
Butter: 1 1/2 sticks (175g, hey it's the holidays!)
Salt and white pepper: to taste

Instructions:

First of all lemme channel my inner hillbilly

It's a Leek
LOOK AT THIS PHOTOGRAPH!!

1. Heat up your stock at a low heat, a simmer, there shouldn't really be any movements in the liquid.
2. Referring to the leek diagram, cut out section one, the darkest green part, it's very flavourful but really tough so you will use it to flavour the stock. Clean it by submerging it in some water first than throw it in with the chicken stock.
3. Peel the ginger and slice it thinly, add that to the stock as well.
4. Now wait for an hour or so, or until the stock seems have a nice flavour of ginger and leek.
5. Divide the leeks into section 2 (light gree) and 3 (white) , save maybe one leek's worth of section 3 for later. (That's a bad leek btw, you should choose a leek with more white parts than that!)
6. For the rest of the leeks, cut the end of them and then cut it in half vertically, then you can see the different layers, run them under the water while flipping through the layers...much like a book.
7. After they are wash, just slice them horizontall, thinly.
8. Melt half a stick of butter in low heat, then add the sliced leeks, add a two pinches of salt.
9. After the leeks have sweated out a lot of moisture and they are really soft, add the stock.
10. Peel and cube the potatoes, add them to the stock. Cover the pot with a lid and turn to high heat.
11. When the potatoes are very soft (check after 15 minutes) you should blend it till smooth. Turn it down to low heat.
12. Add the rest of the butter, and season with salt and white pepper (black pepper makes it look like specks of dirt).
13. If you like the consistency then it's good, if you want it to be thinner you can add more water or stock, if you want it to be thicker, let it simmer out some more liquid!
14. For the leek you reserved, cut it in half, wash it, then separate the layers and julienne it. You place a few slices as garnish for the soup.

This soup is really simple but elegant while being comforting. Like drinking a baked potato!

Second Course

Hors d'oeuvre

Stuffed Campari Tomatoes
Servings: It makes 20

Stuffed Campari Tomatoes

Ingredients:
Campari Tomatoes - 10
Ricotta - 125g
Chives - 30g
Salt - to taste

Instructions:
1. Cut the tomatoes in half, using a serrated spoon, scoop out the seeds and pulp.
2. Mix the ricotta with a bit of salt and the chopped chives.
3. Using a towel, dab the tomato halves dry, scoop the cheese mixture into the tomatoes.

THAT'S IT!! You can experiment with cheeses too, I personally prefer goat but my friend really hates goat cheese and goat products.

Smoked Salmon Rolls
Servings: 7 rolls (times are hard and salmon is expensive)

Smoked Salmon Rolls

Ingredients
Stuffed Salmon - a small pack (7 pieces)
Apple - 1/2
Small Cucumber - 1 (50g)
Celery - 1/2
White wine vinegar - to taste
Olive oil - to taste
Honey - to taste
Chives - 4 strands
Salt - to taste

1. Julienne the cucumber, celery, and apple.
2. Make dressing by mixing the vinegar, olive oil, honey, and salt.
3. Mix with the julienne fruits and vegetables.
4. Lay out the smoked salmon, add some of the vegetable mixture at the end of the salmon, and roll the smoked salmon.
5. Cut the chives in half, horizontally and gently use it to tie the salmon roll.

Yea, easy right?! These two appetizers are quick to make and make your dinner look seemingly classy!

Wednesday, November 23, 2011

Using Up Halloween Treats 2: Crispy Crunchy Cake

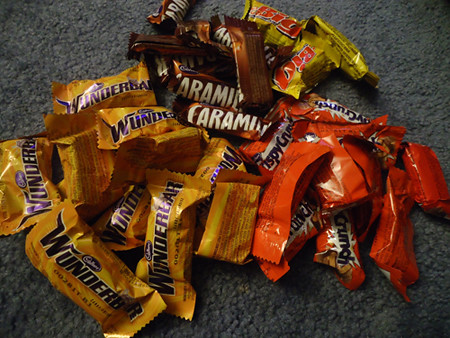
Yes Halloween has been over for awhile now but good thing about candy, they pretty much last forever with that much sugar...

But you only live once!

Image Source,Photobucket Uploader Firefox Extension

So...

Cake

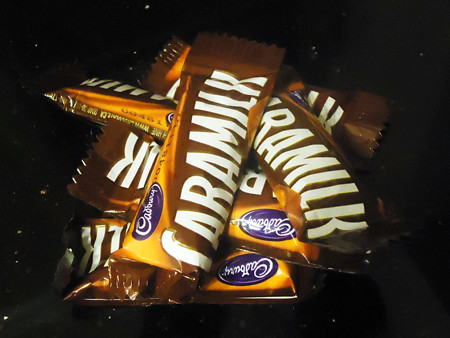
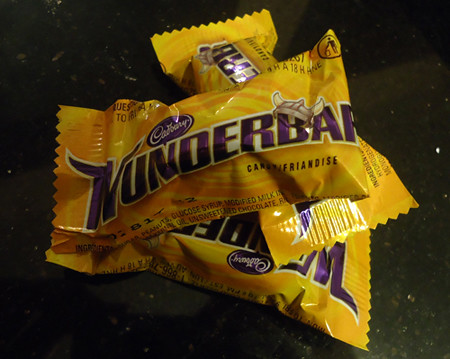
Crispy Crunchy Cake, as you might have guessed it's made with the candy bar, Crispy Crunch.

Crispy Crunch

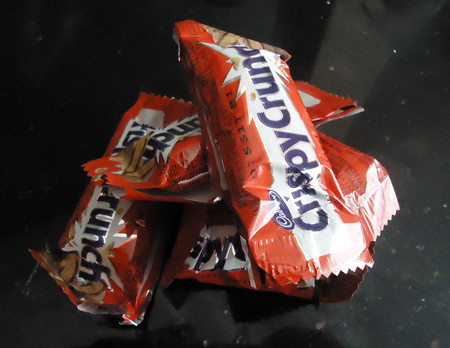
They're peanut buttery but somehow it's has a lot of bite into it and really good. So I decided I want to not really do anything to the candy bars because I want to keep that crunch. Then I wanted cake and duh, chocolate cake for a chocolate bar! Which somehow jump started this whole chain of perfect combinations which starts with peanut butter -> chocolate -> bananas -> Nutella!

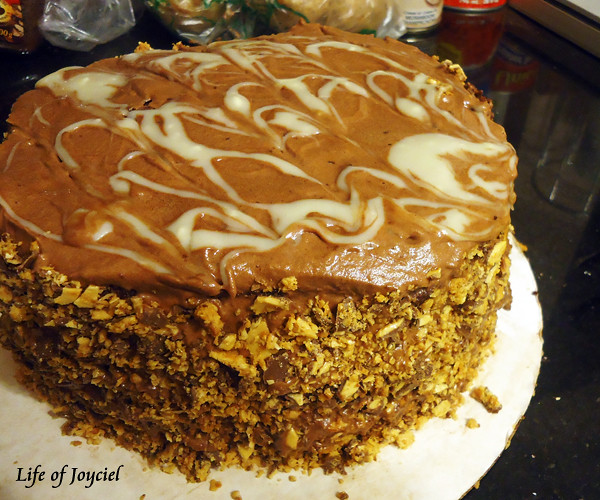
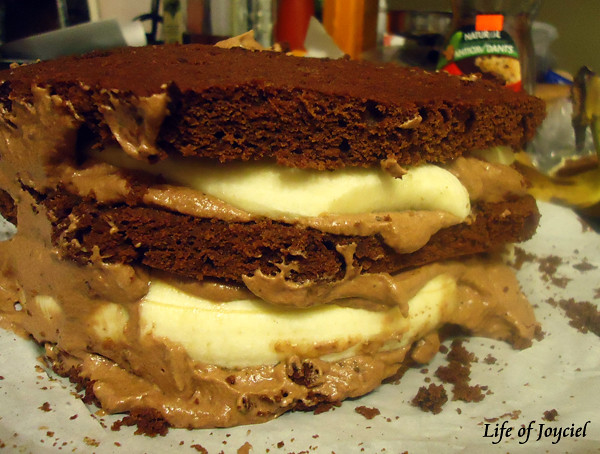
So it ended up with a moist chocolate cake filled with bananas, Nutella frosting, and covered in Crispy Crunch.

Okay I'm going split the recipe in the categories of "making the chocolate cake" and "decorating the cake" and the second part is...quite picture heavy I must say.

Crispy Crunch Cake

Chocolate Cake

Ingredients
Mise En Place.
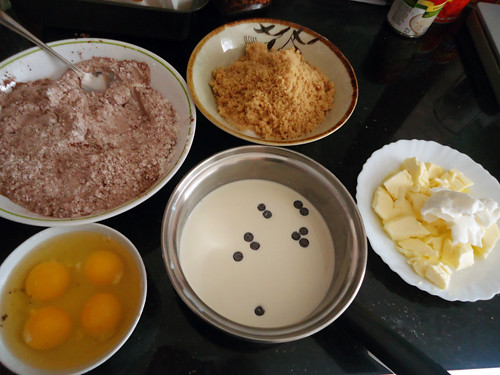
Flour - 300g (2 1/5 cups according to Yahoo answers 140g unsifted flour = cup...buy a scale already!)
Cocoa powder - 100 grams (3/4 cup)
Baking Soda - 1 teaspoon
Baking Powder - 1/2 tablespoon
Salt - a pinch
White sugar - 200g (1 cup)
Brown Sugar - 200g (bit less than 1 cup? It's supposed to be 220g for 1 cup for brown sugar)
Butter - 200g, cubed (1 1/2 cup, if you have a block uh...just cut it a bit smaller than half it's also about two sticks)
Shortening - 50g (1/4 cup)
Cream - 100 ml

Instructions
1. Preheat oven to 325
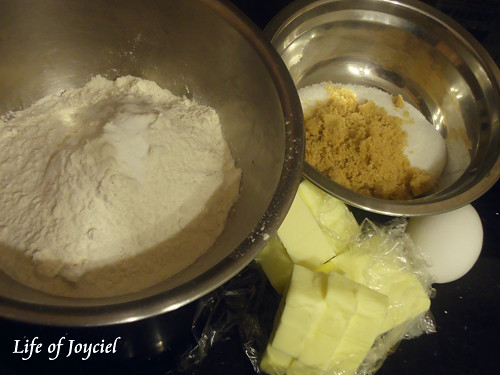
2. Cream the room temperature butter and shortening with the sugars until light and well incorporated.
3. Meanwhile, melt the chocolate and 100ml of the cream
4. Add the eggs slowly, one at a time at low speed until well incorporated, then turn the speed to high till the batter starts getting fluffier. Add the melted chocolate.
5. Sift the flour, cocoa powder, baking soda, baking powder, and salt. Slowly add to the batter at slow speed.
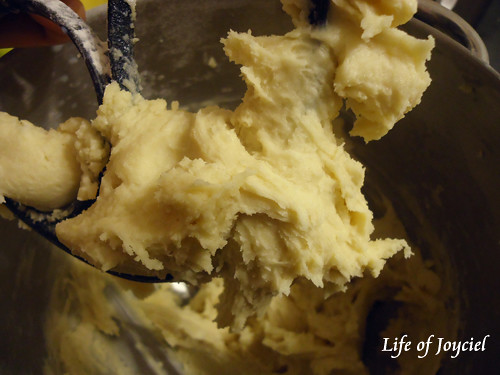
6. Turn up the speed till the batter is light and fluffy.
Cake Batter
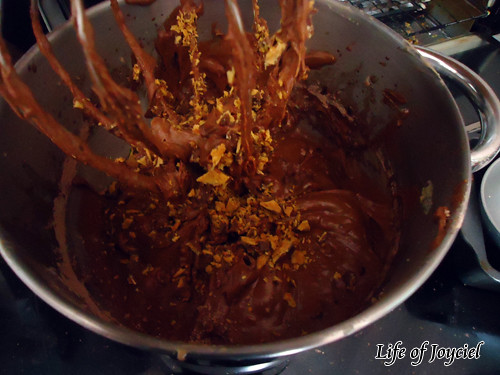
Like so. You can see I added some candy bar bits but I don't think you should because it melted anyways and the flavour gets lost in the chocolate.
7. Pour the batter into two 7 inch pans and put in the oven, middle rack.
8. Take out after 30 minutes or check with a toothpick (when it does come out clean, have a feel for the cake so you know how it feels when it's done.)
9. Let the cake rest until it's room temperature.

Decorating The Cake

Ingredients
Crispy Crunch - 15 small bars (or you can use like 4 big bars)
Nutella - 250g (they come in 400g jars so half of that and then two big spoonfuls)
Unsweetened chocolate - 100g
White chocolate - a small handful
Cream - 400 ml
Bananas - 4-5, ripe (there should be a few dots on them, but not full of dots)

Instructions
Whipped Cream
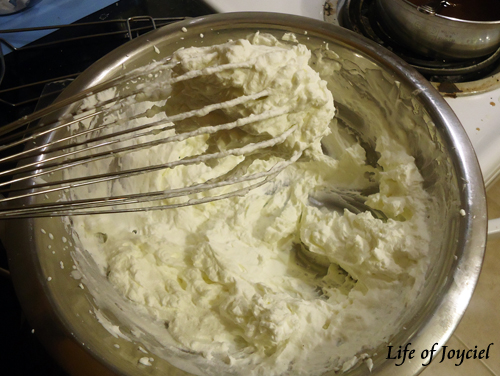
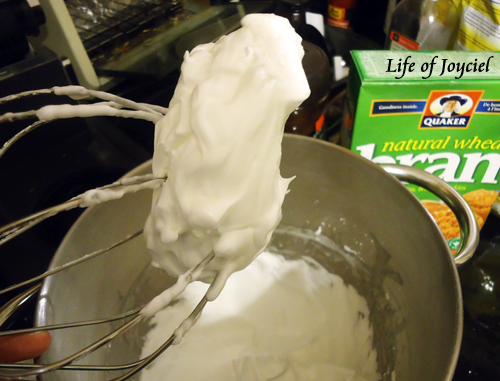
1. Now make the frosting, whip 390ml of the cream till it's firm (shouldn't drop if you hold it upside down)
Nutella Frosting
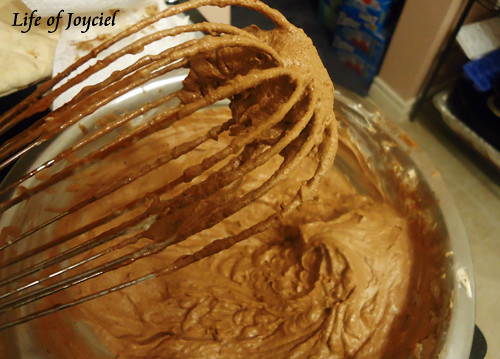
2. In low speed, add the nutella, then turn it back to high speed until well incorporated. Keep the frosting in the fridge until it's time to use it.
Cake Layers
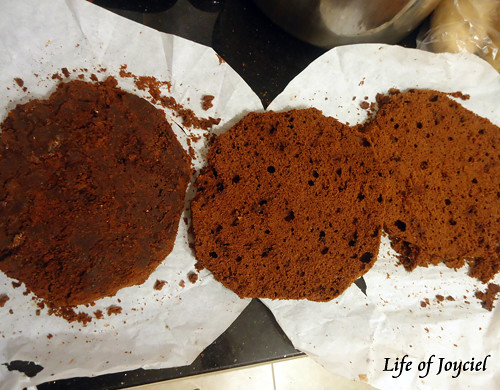
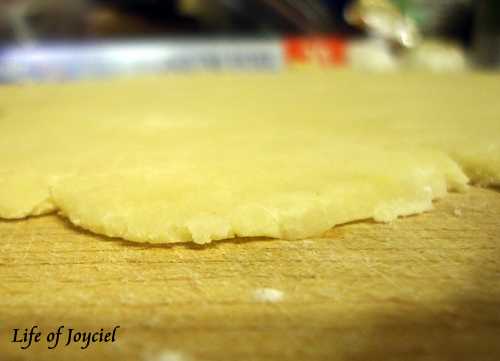
3. Once the cake is cool, cut the top part (the part that looks like a dome) so the cake will be flat...like a perfect cylinder. Than cut the cakes in half, making four cake layers. If you're wondering why one of the layers there is different looking...I dropped the pan mid bake and it collapsed within itslef, it's more condensed.
4. Now you only need three of the layers because I thought it's a bit tall with four layers but you can if you want to.
Layering the Cake 1
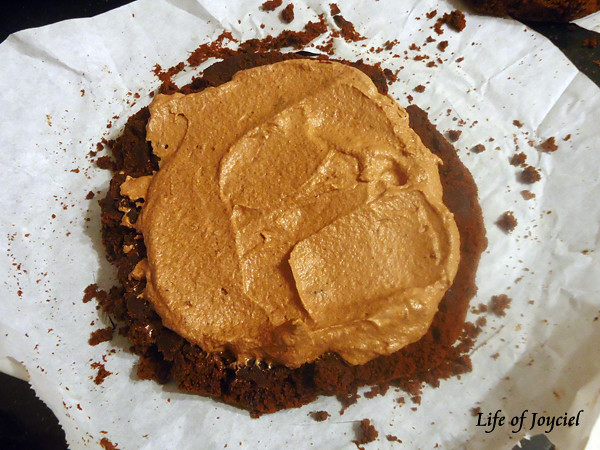
5. Add a bit of the frosting to one of the cake layers, spread it around with a palette knife but not all the way to the edge.
Bananas
6. Cut the bananas in half, lengthwise.
Layering the Cake 2
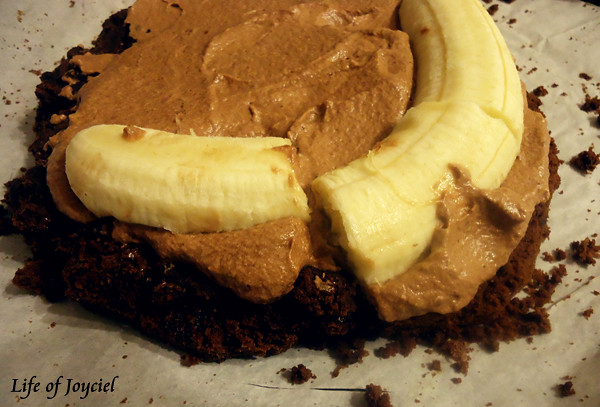
7. Line the bananas at the edge, as you can see, the pressure from the bananas kinda pushed the frosting to the edge, it would've went overboard if you spread the frosting all the way to the edge in the first place.
Layering the Cake 3
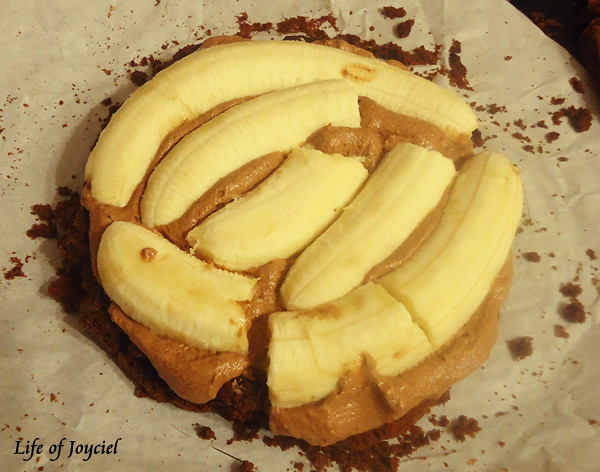
8. Put as much bananas as possible.
Layering the Cake 4
9. Fill in the gaps with more frosting.
Crispy Crunch
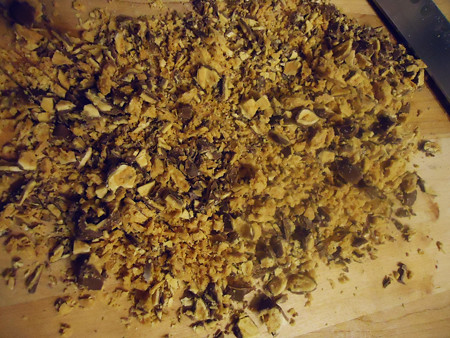
10. Chop 6 of the candy bars (1 1/2 large one), sprinkle the chopped candy bar on top of the bananas.
Layering the Cake 5
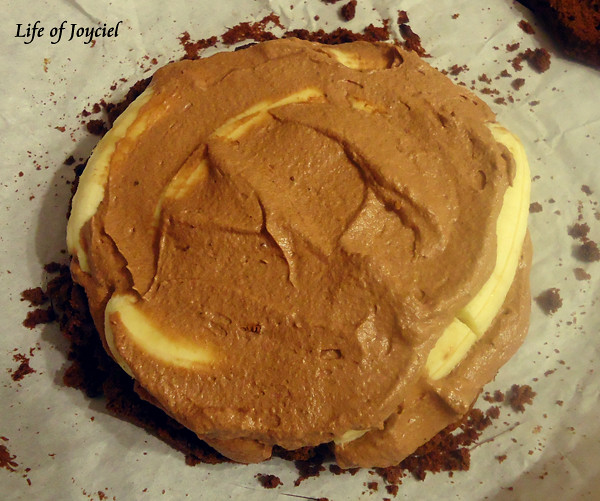
11. Repeat with the second layer and then top it off with the final layer.
Frosting the Cake 1
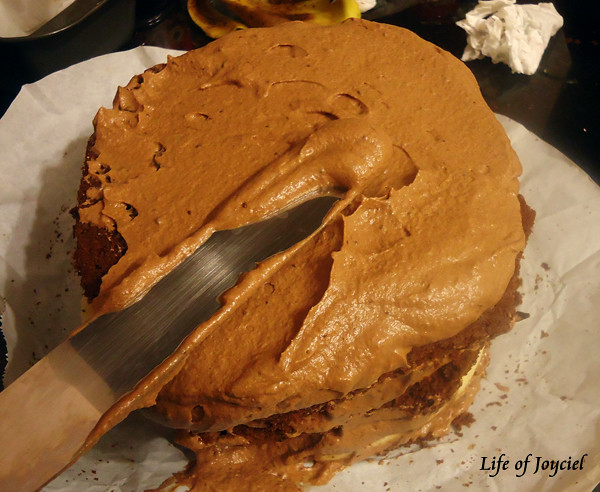
12. Pour most of the frosting on the top of the cake. Using a palette knife, spread the frosting on top, pushing the frosting to fall down on the sides until there's a thin but adequate layer on top.
Frosting the Cake 2
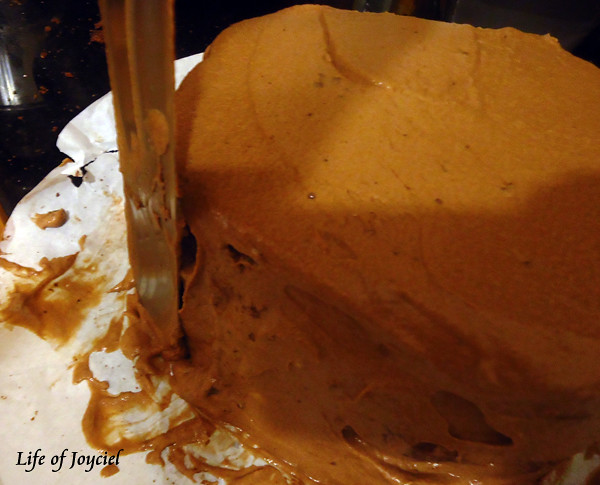
13. Just run the palette knife around the cake to spread the frosting thoroughly. If there isn't enough to cover the cake, if there is not enough, add more frosting, but you have to do the same as in step 11, add it to the top and use the palette knife to spread it.
Crispy Crunch Sides
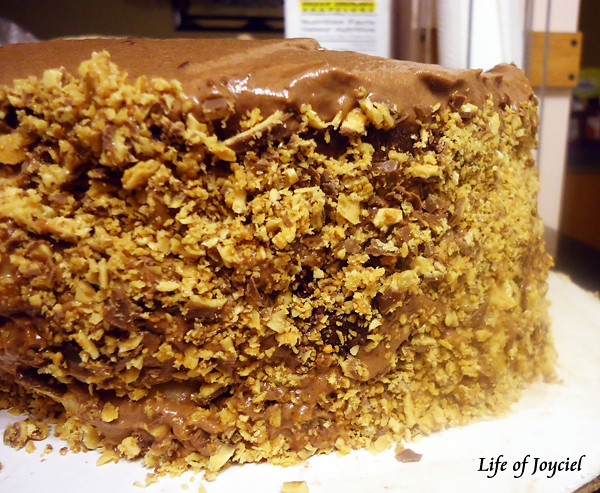
14. Chop up the rest of the candy bar. Just grab a handful and gently pat it on the edges. Then transfer the cake to a cake board or whatever you plan to hold your cake.
15. Now melt the white chocolate with the 10 ml of cream.
Decorating Top 1
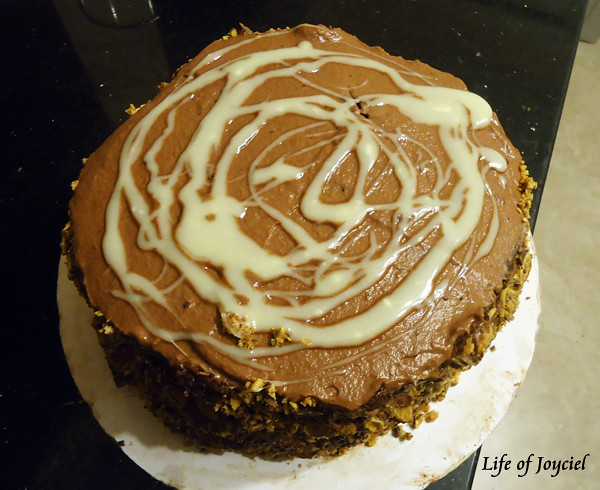
16. Using a spoon, just randomly drizzle circles on top.
Decorating Top 2
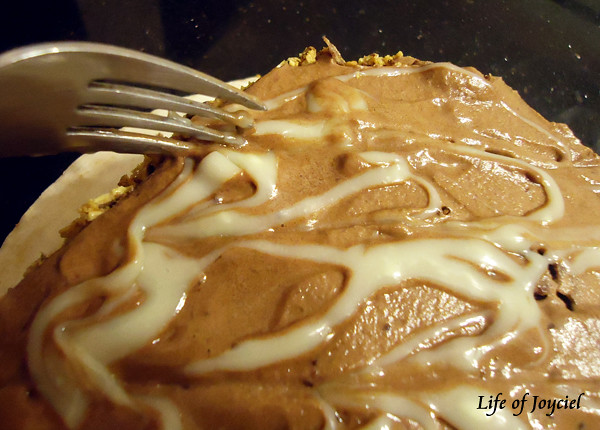
17. Get a fork and drag it from top to bottom in lines.
Cake Top
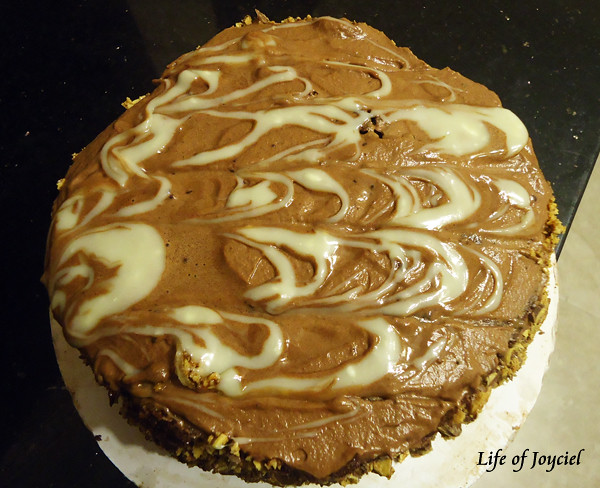
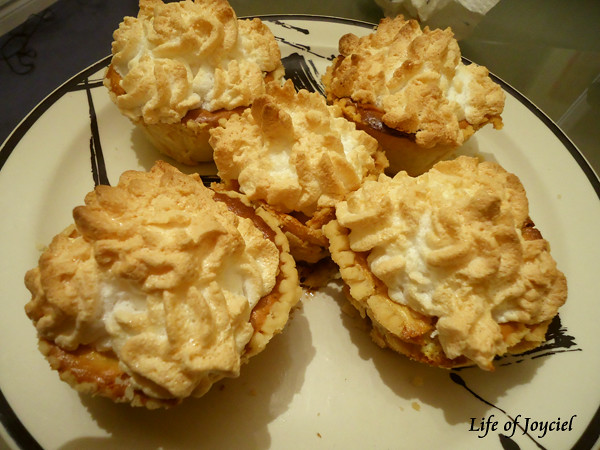
Instantly looks more professional!

Phew! Typing it all out was more tiring than the actual process (fortunately for everyone who wants to make this cake...unfortunate for me who had to type all that.)

I have to say, I think the cake looks alright for me, who never really had to do much cake decorating (it's why I make cupcakes...so I don't have to deal with this bullshit).

Cake (Insides)
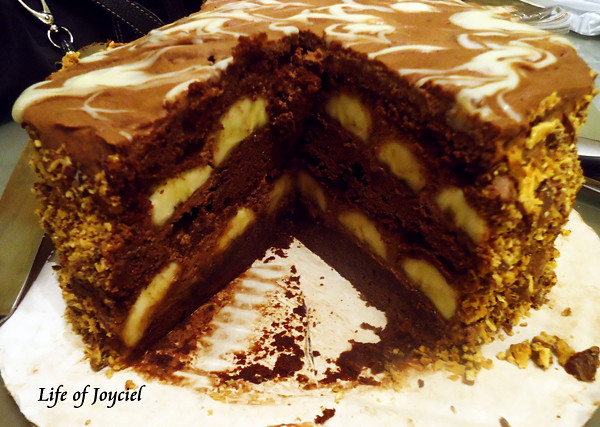
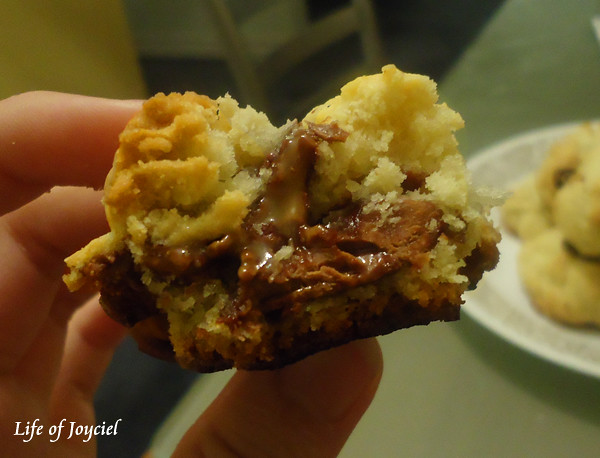
Of course you have to look at the inner beauty as well. It's not just a pretty cake, it has a lot of layers, very complex.

Cake Slice
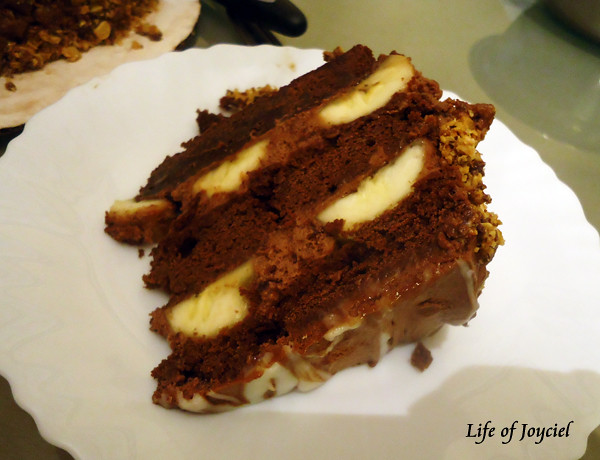
Everyone wants a piece of it!

Well...this cake is just really indulgent which is great for those days when you just want something sweet to make your day happier. Like everything good just comes together, chocolate, banana, Nutella, peanut butter. I love the bit of crunch that the candy bar gives.

Friday, November 11, 2011

Using Up Halloween Candy: WunderPie! (StarPie)

So for Halloween this year I was giving out candy and I bought a big box of various Cadbury chocolate bars.

So before I had this much

Leftover Halloween Candy

And afterwards

Leftover Halloween Candy

Yea not a lot of children, I think they all went to the rich white neighbourhoods which is okay somewhat justified cause Chinese people usually don't give out free things but joke's on them because actually this year a lot of my neighbours were also giving out stuff.

Anyways so I have copious amount of candy what should I do?

WunderPIe/StarPie

Baking the answer is always baking.

This one is all about the Wunderbar (or Starbar if you're from Europe), my favouritest candy bar EVER! It's like there's peanut butter which is delicious and then there's this chewy caramel that matches so well and it's all covered in CHOCOLATE! Also there's this crunchiness that I don't even know how they do it!

So I thought I got this imagery of it being all gooey and melted and I know the best way to do that is put it in a pie! A cup pie to be specific. Nothing ever goes wrong in a pie! I added a cream cheese filling for additional goodness and topped it with meringue to give some lightness to the dessert.

WunderPie
Servings: 5 cup pies

Ingredients:
Wunderbar/Starbar
WunderBar - 5 (one per pie)
Pie Dough - 225 g (I made a post on how to make pie dough here: http://joyciel.livejournal.com/84794.html#cutid1 don't mind my old shoddy camera though!)
Cream cheese - 125g (1/2 block)
Cream - 75 g
Eggs - 2 large, separated
Sugar - 60g (1/3 cup)
Icing sugar - 50g (1/4 cup)

Instructions:
1. Preheat to 350, take the cream cheese out, separate the eggs
Rolled Pie Dough
2. Roll your dough till it's about 3 mm in thickness, remember to flour the surface and the roller frequently!
Molded PIe Dough
3. Just cut them in squares and mold it around the cupcake tin, if there is space or tears, just take some more dough and fill it, no one will notice!
Pie Crust
4. Line wax paper ON TOP of the dough, and fill with rice, this keeps the bottom from rising up. Then I can use the rice later for cooking!
5. Put in oven at bottom rack for ten minutes or until done.
6. While the dough is in the oven, take out the paper and rice, check if the bottom is done, put it back in the oven (without the paper and rice) at middle rack, until done.
7. Cut the cream cheese into square and beat with the sugar in a mixer (stand or hand) with whisk attachment till soft and lighter.
8. Slooooooooooooowly add the cream at low speed until throoughly incorporated.
9. Add the eggs YOLKS, when it's well incorporated, change to high speed to beat some more air into it.
Wunderbar
10. Add the mini wunderbar into the bottom, top it off with the cream cheese mixture.
11. Change the oven to 325, put the cupcake tins on a cookie sheet and add some water to the SHEET (not the cupcake tins lol) this will make a water bath. Put it on the middle rack. Check after 10 minutes.
Meringue
12. In the meantime, whip up the egg whites, MAKE SURE ALL THE EQUIPMENT IS CLEAN!! Any oil and it won't work. Beat the whites till it starts foaming, then add the icing sugar.
13. When the cheesecake part is done (the texture should be jiggly but definitely solid. Like custard basically), let it cool for 30 minutes.
14. Using a star tipped pipe (mines say 825 so I think that's the size...) and make small rosettes around the top, I made five around and one in the middle. (see note)
15. Put in the oven at the middle for five minutes, take out of the oven.
16. Turn the oven to 400, when it reaches 400, put the pies in at the top rack until the top is nicely browned.

Note: I will make a piping post soon (I only know like three styles though) but a good place to learn how to make rosettes are here: http://www.youtube.com/watch?v=Vfbh1UaZSe0 she also did shells!

Pie (Close-up)

Porno shot:

Pie (Insides)

Well the pie was lovely, surprisingly not that sweet. It has all the taste of the wunderbar but with a bit more indulgence with the cream cheese and the meringue give it a lighter texture and flavour that works well with the heavier ingredients. Also it makes the pie all nice looking =D!